Before
 About 5 months after we had bought the house and moved in, our first "official" head to toe remodel took place. By then we were getting a better idea about money as new homeowners and realized we had a little wriggle room (I am talking LITTLE wriggle room) to do things to the house.
I have a thing with bathrooms. I am in them a lot (Pregnancy, potty training... you get it) and I just love a good lookin' bathroom. I think I got this obession from my grandma, who would often theme her bathrooms. Her egyptian bathroom always topped my list.
I knew exactly how I wanted my half bath to look and feel. It was going to look just like this inspiring place in Greece that always takes my breath away (and that I will someday visit):
 TIP: If you go into remodeling or redecorating a room with a theme, picture, style, or color scheme in mind beforehand it will go A LOT smoother and most likely turn out just like you could have ever hoped for. Sketch it on paper, get some samples together, or you can just imagine it in your head, like ME :)
BEADBOARD:
- Because I love traditional I had to go with the beadboard. It makes a room look larger and creates a custom look to your basic home. We got the bead board that comes in big sheets. It is also thinner than I expected and more flimsy. it looks like this:
 We set it out in our garage for a day or 2, which I think you are sopposed to, so it can expand/contract (but don't quote me on this). Make sure to measure precise, but leave yourself a little room for mistakes. It is better to have to go to the store and buy more than have tons leftover.
- Paint the room before you put up the beadboard. I painted the blue before any construction was started. This way you won't have to tape things off.
- If you can, remove the toilet and sink before you install the beadboard. We weren't able to, so Derek had to make about 5-6 seams in the beadboard. He said it was a royal PAIN! If you do have to make a seam, make it where the panel has groove and just follow that line. This way it will come out flawless (you can't even tell where our seems are in the bathroom, good job Derek!).
- To install: Apply Liquid Nails around edges and "S" shapes in the middle to the backside of the beadboard. Press it firmly againts the wall (I was assisting Derek in this) and shoot the nail gun in the grooves of the beadboard where the studs are in the walls (we marked the studs before doing this) on the top of the beadboard then along the bottom.
Here is a graph I made to show you how to nail. The "X" is the studs we marked beforehand and the red circles are where we nailed. Do this the for the whole wall. (Click on the pic to see it larger)

 Below the sink
BASEBOARDS & CHAIR RAIL:
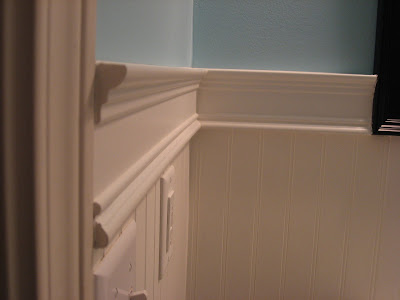
 We had the beadboard go all the way to the floor and put the baseboards over the beadboard, but this meant we had to claulk the grooves we could see from an arial vew. But we liked the look better this way.
 Ariel View of Baseboards
  Mirror is from Target, under $30!
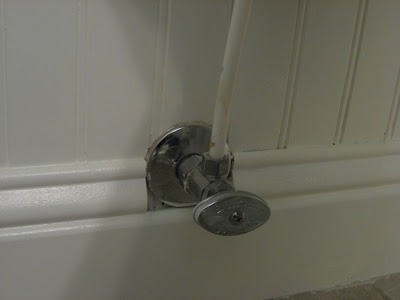
TIP: Make sure you get your new mirror before installing the entire room! Also, make precise cuts around plumbing etc.
SPACKLE, SANDING, CAULK & PAINTING:
 I never realized how much finish work there was. This is the one moment when I wished I could hire someone (but again, it is SOOO worth it after it is done and you save hundreds!). It takes a lot of patience, a lot of time, and tons of detail work.
The spackling, caulking, sanding and painting can either make or break your project. Spend the extra time to do an extra detailed job so your work will turn out professional looking instead of "starter home amatuer" looking.
 I am still in love with my perfectly smooth corners
 We used caulk on the top edge of this sink, I used my finger to smooth it over.
 TIP: Tape the wall a pinch above the chair rail before you caulk and paint. Once you are done with all the finish work you tear that tape off and it comes out with a smokin' HOT clean line that looks pro!
 After all that work, the end result was amazing, for a fraction of the cost- a couple hundred bucks!!
 The Facts:


 Below the sink
- Be sure to pick the baseboards and Chair Rail you love, or that fit your budget. We were in a hurry (it was a snow storm and our twins were nursing babies who were at home with a 14 yr old babysitter at the time) so I picked baseboards that I don't plan on doing throughout the house when we change out our other "starter home" ones. We also went with Chair Rail that was a little more pricey than some other options, but it gave that dramatic look I was going for.

 We had the beadboard go all the way to the floor and put the baseboards over the beadboard, but this meant we had to claulk the grooves we could see from an arial vew. But we liked the look better this way.
 Ariel View of Baseboards
 - The Chair rail was installed above the beadboard, vs. on top of the beadboard, flesh to the wall.
- Nail the chair rail and baseboards the same way we did the beadboard, on the marked studs, in the middle of the wood (which is easier to spackle and make the holes dissapear).
- The height of the beadboard and chair rail depends on your own taste. I am dramatic and I wanted it above the light switches, but this meant we had to install around the mirror.
 Mirror is from Target, under $30!
SPACKLE, SANDING, CAULK & PAINTING:
 I never realized how much finish work there was. This is the one moment when I wished I could hire someone (but again, it is SOOO worth it after it is done and you save hundreds!). It takes a lot of patience, a lot of time, and tons of detail work.
The spackling, caulking, sanding and painting can either make or break your project. Spend the extra time to do an extra detailed job so your work will turn out professional looking instead of "starter home amatuer" looking.
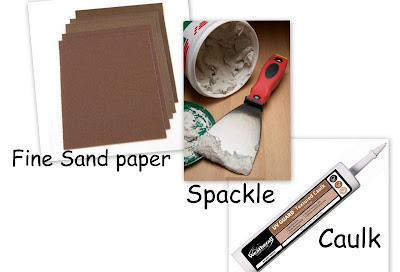
- Fill in all your nail holes, corners and edges of the baseboard, beadboard and chair rail with the spackle. I found that using my finger to smooth it out, rather than the spackle "tool", made a cleaner finish (especually the corners and edge of the chair rail and wall)
 I am still in love with my perfectly smooth corners
- After several hours, when the spackle has fully dried, go over it softly with fine sand paper to make it extra smooth. Repeat this process over and over until you come out with perfectly smooth surfaces that make those holes look like they were never there.
 We used caulk on the top edge of this sink, I used my finger to smooth it over.
The work would not have turned out as detailed and amazing if I did not have my anal, construction manager, guru husband by my side. He was very annoying at times, but he knows what he is doing so I quickly followed his instructions :)

- Painting... oh the painting. Brush strokes and roller lines are a bad word for my husband, and a big PET PEEVE! I used a foam roller over the beadboard, a brush to fill in the grooves, then a foam roller over the brush strokes to smooth it over. I also used a little 2 inch roller for the baseboards and chair rail. I made sure to use a semi-gloss paint because it was in the bathroom and that has worked out really great. Just wash off water spots and dirt and looks good as new.
AFTER
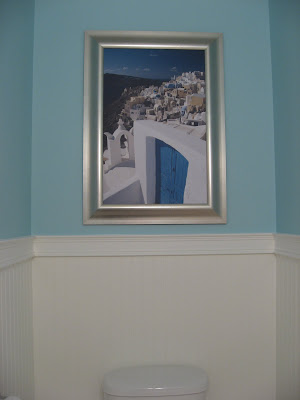
 After all that work, the end result was amazing, for a fraction of the cost- a couple hundred bucks!!
 The Facts:
- Height of the beadboard and chair rail 53" Tall
- Cay, from Sherwin Williams, is the blue paint. It is way too bright to do a whole room, but the white really tones it down and makes it pop, I love it!
- Powdered Snow, by Behr, is the bright white. I now use this white for all my other white projects.
- Art Work (all under $20)- Allposters.com with 20% discount. I had them custom framed which was a little pricey, but I will keep them for years to come :)

