I blame the mess on nursing twins and potty training a 2 year old at the time:
BEFORE


Inspiration: The feeling of a clean, crisp, fresh shower with a hint of coziness.
AFTER
 BEFORE
AFTER
 Now I just gotta deal with all the laundry :)
BEFORE


Inspiration: The feeling of a clean, crisp, fresh shower with a hint of coziness.
- I picked a paint color. "Liveable Green" by Sherwin Williams. However, it is more than liveable, it is breathable!!
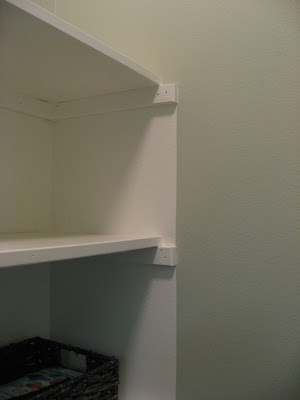 I started by painting the wooden shelving WHITE. I painted the shelving along with the wall behind it and the side to create a "built-in" look. I LOVE how it turned out! The best part about this is it was ZERO DOLLARS because I used primer and paint I already had :) Now that calls for a big sigh of relief for my husband.
- REPLACE cabinetry (or lack of). I had to get cabinets, vs. shelving, to hide all the stuff. I hate clutter... HATE clutter (too bad I have 3 little ones that leave clutter toys all over my house...). So I went with IKEA cabinets. $150 for both cabinets and I used knobs I already had leftover from the kitchen.

 Organize. I got the baskets on the shelves for under $5 each from WINCO foods (who woulda known?). The metal basket and soap container I got at Home Goods. Love 'em. The brooms and ironing board are now hidden behind the door taking up, ZERO space!
 A cute little touch on the floor for color. I really wanted to replace the icky RUBBER baseboards (what is with those darn rubber things? They are all over my house!!), but my husband just thought 'why spend the money on the laundry room?' ..."because honey, I am in there everyday! And it has to be pretty!!"... maybe another day.


BEFORE
AFTER BEFORE
 Now I just gotta deal with all the laundry :)
Wow! What a great transformation! I love the color. The cabinets are so much nicer (love hidden storage) and those shelves are perfect. What an inspirational makeover. I need to move my laundry room up a few numbers on the DIY list!
ReplyDeleteThanks for sharing all of your amazing DIY ideas and projects! ;)
Roeshel
This turned out great! Doesn't even look like the same space. Coming over from DIY Showoff and love all of the projects I've seen so far. Great job!
ReplyDeletepk @ Room Remix
I love the transformation in here! I think I found a new blog to follow. :-)
ReplyDeleteYou've done some awesome transformations! Keep it up...it's fun seeing all your pictures!
ReplyDeleteNancy
Looks great! Did you use 2 of the same cabinets over the washer/dryer and just turn one horizontal?
ReplyDeleteJust curious as to how the horizontal cabinet opens and if it is very functional that way?
Wow, speechless. Now, a word about the before shots, if you could only see my current laundry space, you would no longer be afraid of yours. Mine is a downright disaster. Terrific makeover!
ReplyDeleteJessica- The cabinets are 2 different ones. It is from IKEA's kitchen collection. They offer many sizes and styles! I shopped online at home (twins only last so long in the store), measured it out at home, wrote it all down,then went to IKEA and got them speedy fast. And they are WAY easy to install (but then again, anything is easy for my handy man).
ReplyDeleteI also had the cabinets open from the middle, thought that was easiest with that darn slanted ceiling :)
That looks great! You have a nice sized laundry room too. Mine is just a tiny nook/hallway that connects the house to the garage. Not much to look at there. I love the rug on the floor too. I love color!
ReplyDeletegreat job! i wish so much that i had a space like this.
ReplyDelete